Staying organized is very important for professionals in today’s working scenario. Whether it’s an online meeting, a seminar, or a conference, documentation is necessary. This documentation can help in making a report or a presentation later.
People – who have just started their professional journey – get stuck when they have to do this type of documentation.
If you are reading this blog post then it means you are also facing the said difficulty. But no need to worry now.
Below we are going to tell you about a JPG-to-Word tool that will make it easy for you to document a video conference.
In this article, we will highlight 11 free Chrome extensions that can assist you in streamlining your SEO tactics, saving time, and improving the rankings of your website on search engines such as Google or Bing.
Learn Basic to Advanced Graphic Design Course designed by industry leaders with complete planning that makes the way easier for learners.
Steps for Documenting a Video Conference
Table of Contents
Steps for Documenting a Video Conference
JPG to Word Converters – These are the tools that allow users to convert images with ease into a Word document in an organized manner. These tools bring the following benefits to the users:
- You do not need to pay anything as most of these tools are free to use.
- JPG to Word converters can convert a bunch of files into a document collectively.
- The accuracy of these tools is much known. One can get the output in an organized manner. This means there will be no change to the layout or quality of the images.
Follow the steps below to document a video conference using these types of tools.
Step 1: Capture Screenshots
During the conference, you need to capture the screenshots of all the necessary pages. They might be of an important personality, have statistics, or may be describing a methodology. Do not miss capturing them.
Windows users can do this by pressing “Windows Button + PrtScr” on the keyboard. While MacBook users have to press “Shift + Command + 4.”
If attending the conference on the phone use the phone screenshot feature.
Step 2: Choose a JPG to Word Converter
When you get free from the conference organize all the screenshots into one folder. After that search for a reliable tool that can get the work done smoothly. By reliable we mean to choose a tool that provides organized output and allows you to submit image files in bulk.
Some popular options include JPG to Word converters by Imagetotext.info and Jpgtotext.com. Both are free to use, and the working is almost similar.
Step 3: Upload the Files and Convert
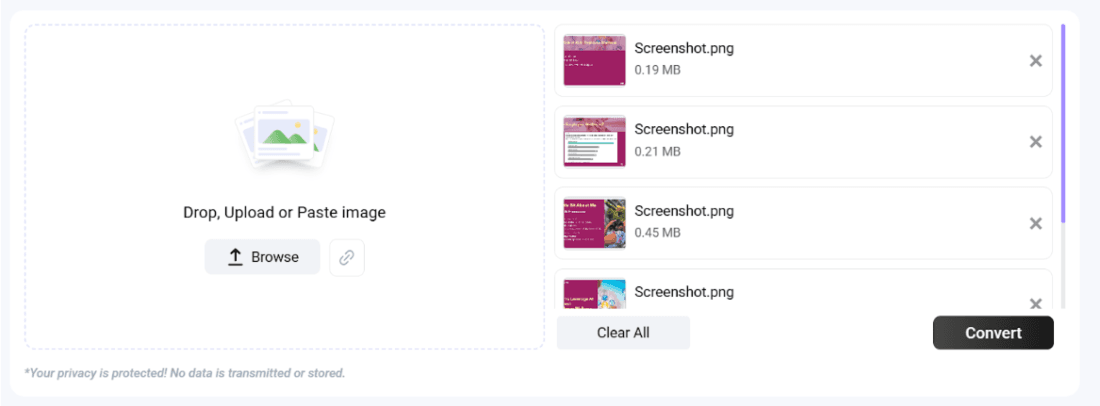
Once you have chosen a tool the next step is to upload JPG images onto that tool. We are going to show you the process using one such Image to Word Converter. The tool we are using is offered by Imagetotext.info for free and has the ability to handle bulk files at once.
For demonstration purposes, we are going to upload the screenshots of a presentation presented at a video conference. There are two ways to upload images to the said tool.
- Drag and drop your images onto the tool’s input box
Click on the “+Browse” icon

You can make adjustments to images by clicking on the crop icon. You can see it on the top right corner of each image. Once all the image files are uploaded you need to hit the convert button at the bottom.

Step 4: Save the File
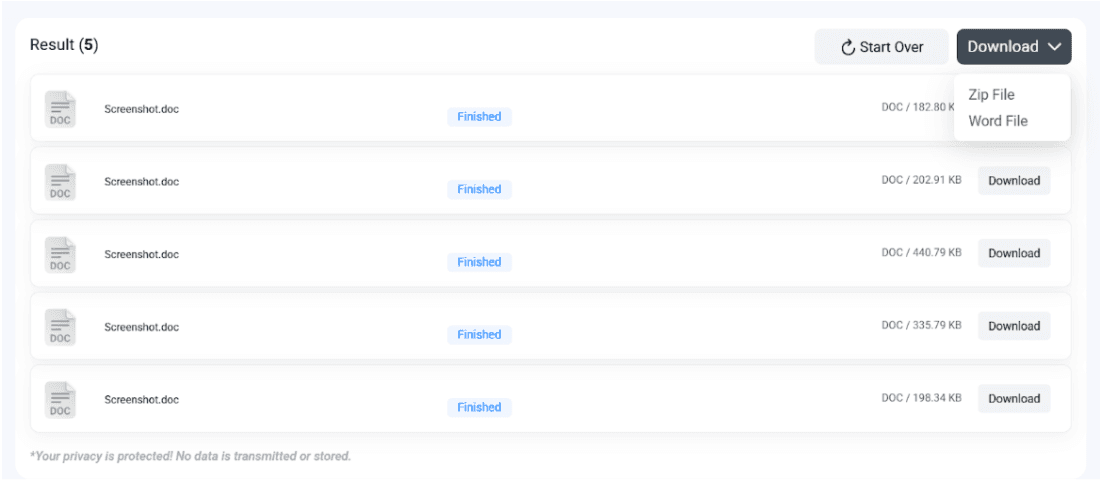
After hitting the “Convert” button wait for a few seconds and let the tool process images. After completion, you will see a message “Converted Successfully” below the name of each image.
To download the Word document, click on the “Download > Word File” button at the top. Your Word document will be downloaded automatically.

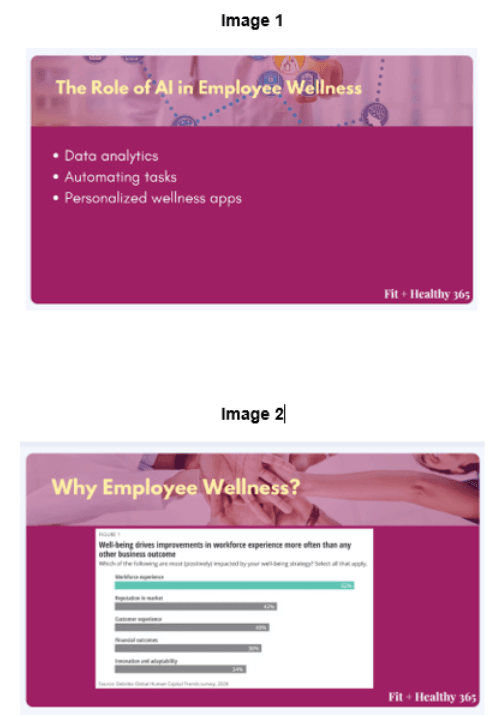
Below we have provided the screenshot from the output. As you can see the results provided by the tool are well organized. Plus, they are in the same sequence in which we uploaded them onto the tool.

Now you can open the Word file and add your notes against each screenshot. Hence you can prepare a complete document to report any online meeting or conference.
Benefits of Documenting a Video Conference in Word
Documenting the things discussed in a video conference can bring various benefits. For example:
- You can preserve important images, charts, graphs, etc., along with captions and comments. This can help you in the preparation of the conference report plus also assist you in future agendas.
- Documenting will make things accessible to colleagues who have not attended the conference due to any reason.
- By documenting you can maintain an official record of the conference in office archives.
- The Word document is easy to share with others. If the conference information has to be published you can easily make the document public.
- Last but not least, documentation can also help you in training the new employees about the company workflow.
End Talk
You can document a video conference in Word either manually or also by using tools. Manually doing this documentation requires a lot of hard work and time. You have to manage each image one by one. But the tools discussed above can do this work with ease.
So why struggle?
We hope that the above explanation has made you understand how to document a video conference using JPG to Word tool.
